Add job fields
On the "Jobs" tab, you can add or edit so-called job fields to existing jobs. To do this, follow these steps:
- Click on the desired job in the list of jobs.
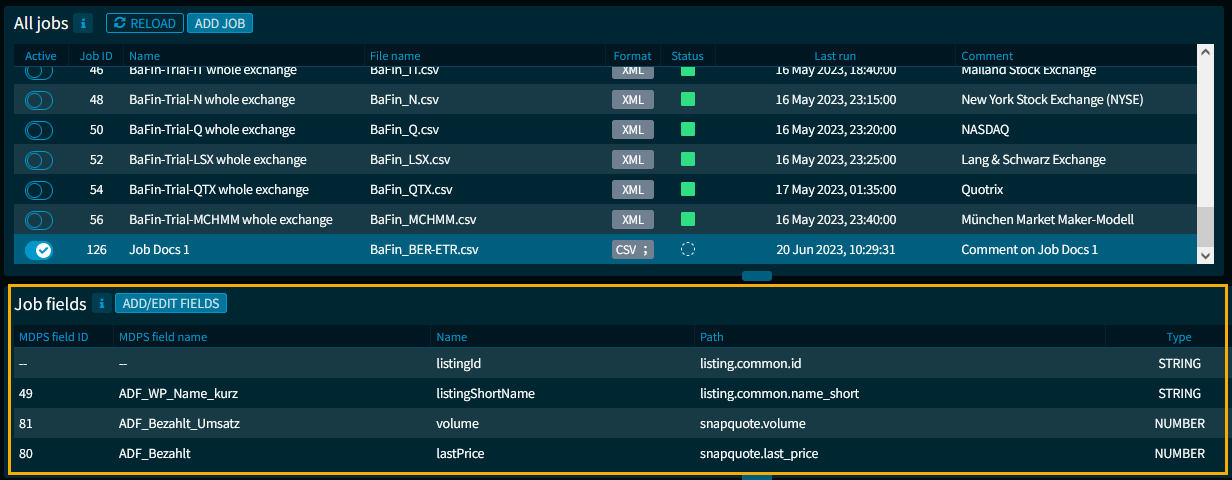
The "Job fields" area appears below the list. - Then select the button "Add/Edit fields" there.
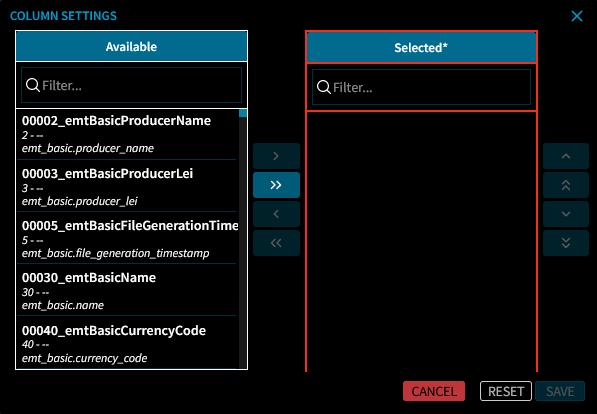
This opens the "Column settings" dialogue window.
In the dialogue window, select the desired available columns by marking them on the left side and then adding them to the list of selected columns via the corresponding arrow buttons in the middle to the right.
Use the two upper filter fields to search for the columns. Various entries are possible here: CDAPI field name and path, IDS field name or also ADF field number.
In the lists, you can select several fields together and move them using the double arrow buttons.
You can move the fields up or down to change their order by using the arrow keys in the list of selected fields. This allows you to determine the order in the output file.
- Confirm your settings with the "Save" button and thus close the "Column settings" dialogue window.
This displays the fields in the list of job fields for this job.
The columns of the list for the job fields in detail:
| Column | Description |
|---|---|
| MDPS field ID | The unique ID of the field. |
| MDPS field name | The name of the MDPS field, for example, "ADF_ISIN". |
| Name | The name of the field, for example, "ISIN". |
| Path | The path to the field, for example, "instrument.common.isin". |
| Type | The field type, for example "string". |
| Description | A description or more detailed explanation of the field. |
